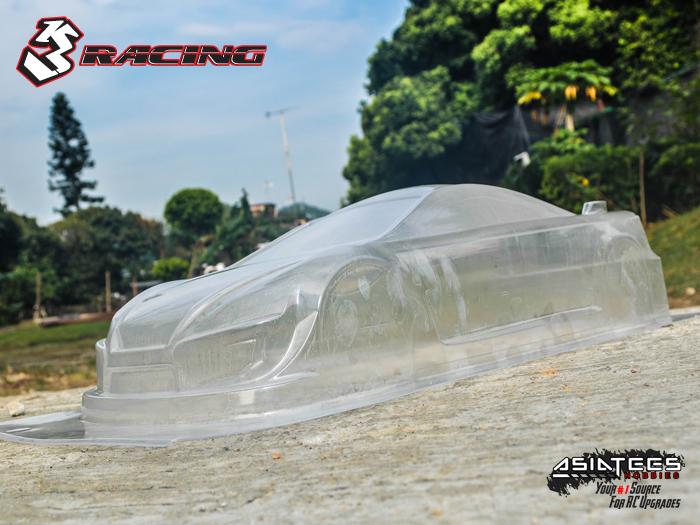
3Racing Lightweight Lexan Body For 1/10 Touring Car
This transparent 1/10 body (part#: BDY-TO14/V2) is molded from crystal clear Lexan and it features an aggressive styling, giving you limitless possibilities to make it a unique body.
Just in case you are not so sure about lightweight bodies, here are some tips. Lightweight body is actually quite durable because it absorbs impact better than the regular weight ones and it also makes the center of the gravity lower. The extra flex brought by light weight makes the car roll less, also less down force when it's at high speed. If speed is the top factor in your race, then you definitely should go with lightweight bodies. A regular weight wing can be considered if you are not one of the top drivers yet. After a while, you may see marks from the crashes appear on the body because it got bend so many times, but it's those crashes saved your car body from broke.
This item includes all the following parts:
- M3 x 8 Button Head-Socket (2pcs)
- Nut-3mm Lock Nuts 3mm (2pcs)
- BDY-TO14 Body Sticker (1pc)
- BDY-TO14 Body Windows Sticker (1pcs)
- BDY-TO14 1/10 Touring Car Body (1pc)
- BDY-TO14 1/10 Touring Car Wing (1pc)
- Double Side Tape M3 (1pc)
- Flank (2pcs)
Step 1 Clean the body, better both inside and outside, with a non-abrasive cleaning sponge with non-corrosive cleaning solution or soap. Put it in a dust free environment and let air to dry it.
Step 2 Apply window masks as shown in photo, also in a dust free environment.
Step 3 Paint the body with polycarbonate spray paint. You can apply paint in thin coats and allow the air to dry it. Please make sure the final coat is completely dried up before moving to Step 4.
Step 4 Remove window masks & protective film outside of the body and create openings for the rear wing.
Step 5 Trim excess body material with a high quality curved scissors and a hobby knife. Align front wheel arch and create body post openings using a high quality reamer. Create rear wheel arch as shown in photo. Use fine sandpaper to smooth the edges.
Step 6 Apply decals.
Step 7 Attach rear wing using the supplied hardware (as shown in photo) (you may need to refer to your race sanctioning organization for legal dimensions and positioning of the rear wing). Use high quality double sided tape to attach the rear wing side dams.