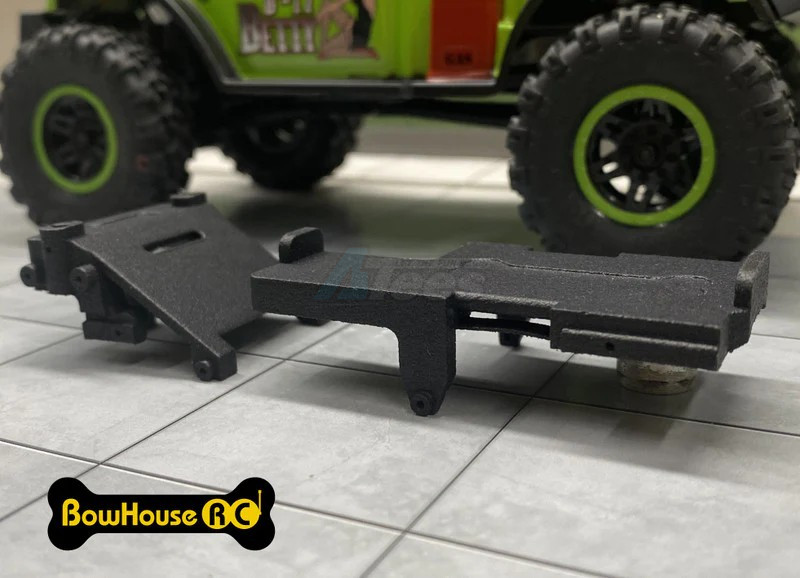
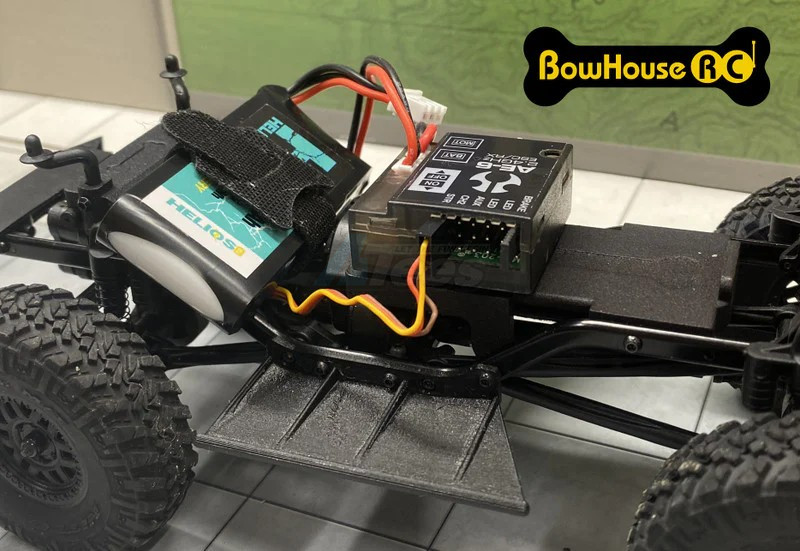
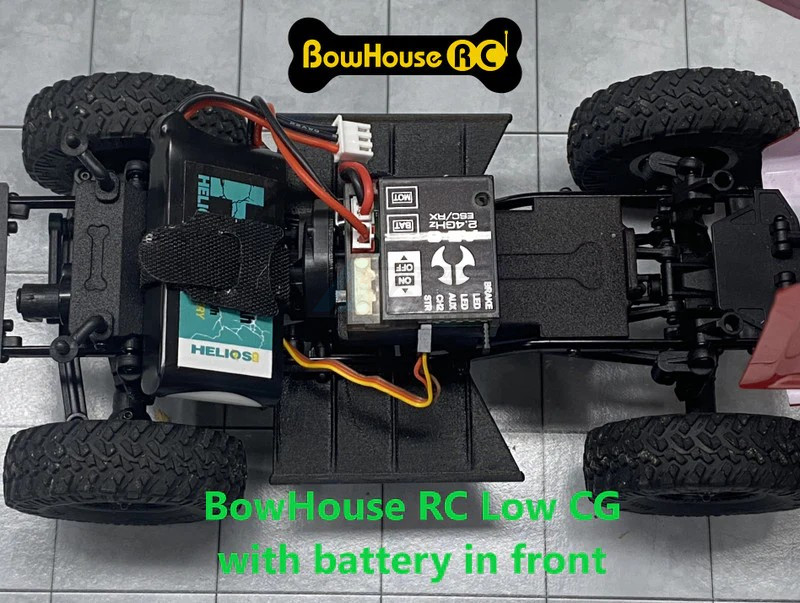
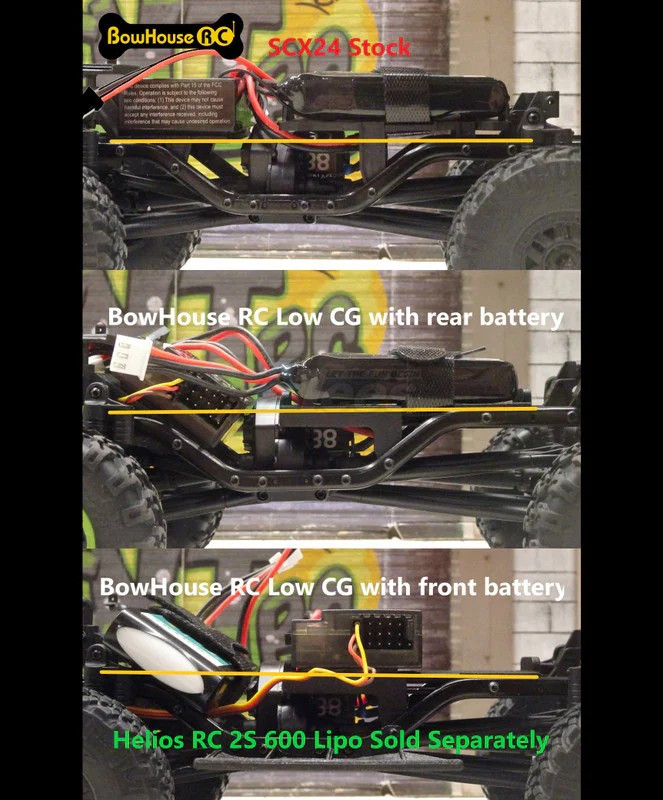
Tiny #tinytrucks are all the rage, and the Axial SCX24 is leading the charge. You can take your little dynamo to the next level with our BowHouse RC Low CG Conversion Kit for the SCX24. Here are the highlights: Low CG battery tray drops the battery by 4mm down to the top of the rails Low CG ESC tray rotates and lowers the ESC below the rails ESC tray includes integrated shock mounts in 2 positions for compatibility with all SCX24 models Option to install battery on ESC tray and ESC on battery tray for maximum forward weight bias Reuses stock hardware for installation Please note: The ESC tray will fit on the new Gladiator model but the battery tray does NOT fit the Gladiator.
Includes:
1x low CG battery tray
1x low CG ESC tray
Installation Notes:
Battery tray:
Remove the stock battery tray by removing all 4 screws holding it in place. Save screws for installation of BowHouse battery tray.
Gently spread the chassis rails to remove the stock battery tray from the chassis.
Remove the stock hook-and-loop strap from the stock battery tray and install on BowHouse RC battery tray.
Before installing the BowHouse battery tray, start a screw into each screw hole in the BowHouse tray for 3-4 turns.
Gently spread the chassis rails to insert the BowHouse battery tray in chassis. You may need to gently bend the upper motor lead down for better clearance.
Insert all 4 screws to secure BowHouse battery tray to chassis.
ESC mount:
Remove the stock body mount(s) from the shock towers and save stock screws.
Remove the stock ESC from the stock ESC mount carefully. If removed carefully, you can reuse the double stick tape on the bottom of ESC. If necessary, remove the original double-stick tape and replace with new tape, hot glue, or other adhesive.
Unscrew upper ball studs securing front shocks to shock mounts.
Remove 4 screws holding stock ESC tray in place.
Before installing the BowHouse ESC mount, start a screw into each screw hole in the BowHouse mount for 3-4 turns.
Gently spread chassis rails to remove stock ESC tray and insert BowHouse ESC tray into chassis.
Install 4 screws holding ESC mount to chassis.
Attach shock ball studs to shock mounts in the appropriate position. Note that shocks are mounted in front of body mount posts on certain models (e.g., Jeep Wrangler and C10 versions) and behind body posts on other models.
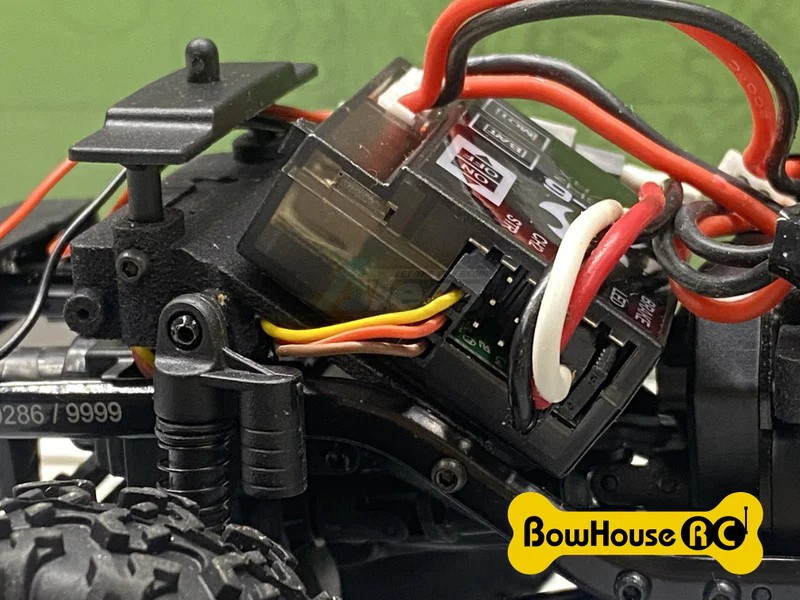
Install ESC on ESC mount. For certain models (e.g., Betty and Jeep Wrangler), ESC should be rotated so that the servo wire plugs are on the drivers (left) side and the motor and battery plugs are located toward the front of the truck. On other models, the ESC can be installed with the servo wire plugs in front and the motor and battery plugs on the passenger side, similar to the stock configuration.
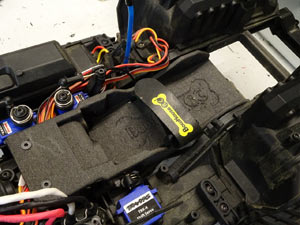
If the ESC is mounted in the rotated position, we recommend running the servo lead through the space between the chassis rail and the BowHouse ESC mount on the drivers side (see pictures).
Install body mount(s) into BowHouse RC low CG ESC tray using stock screws. We recommend using a sewing needle or pin to line up screw holes in ESC tray and body mount(s) before starting the screws.
You may need a short servo extension to plug lights into ESC if you are using stock headlights.
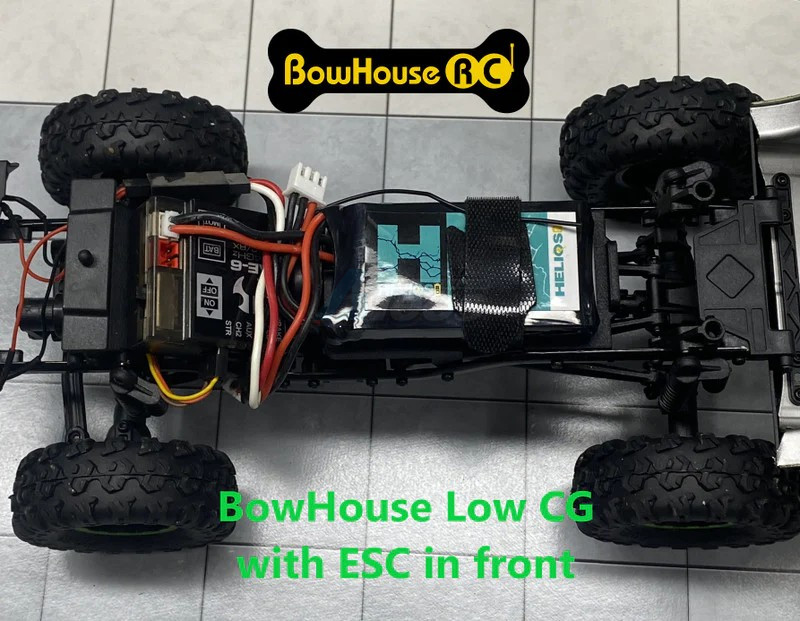
FOR BATTERY FORWARD CONFIGURATION
Follow the same steps to remove stock battery tray and ESC mount.
Install hook-and-loop battery strap into BowHouse ESC mount instead of on battery tray.
If you are using stock headlights, you will need a short servo extension cable to connect the lights to the ESC. On some models, you will also need a short servo extension cable to connect the servo to the ESC.
Battery forward configuration may result in nearly full droop on front shocks depending on your setup.
Package total weight: 19.00 grams (incl. packaging)
Tiny #tinytrucks are all the rage, and the Axial SCX24 is leading the charge. You can take your little dynamo to the next level with our BowHouse RC Low CG Conversion Kit for the SCX24. Here are the highlights: Low CG battery tray drops the battery by 4mm down to the top of the rails Low CG ESC tray rotates and lowers the ESC below the rails ESC tray includes integrated shock mounts in 2 positions for compatibility with all SCX24 models Option to install battery on ESC tray and ESC on battery tray for maximum forward weight bias Reuses stock hardware for installation Please note: The ESC tray will fit on the new Gladiator model but the battery tray does NOT fit the Gladiator.
Includes:
1x low CG battery tray
1x low CG ESC tray
Installation Notes:
Battery tray:
Remove the stock battery tray by removing all 4 screws holding it in place. Save screws for installation of BowHouse battery tray.
Gently spread the chassis rails to remove the stock battery tray from the chassis.
Remove the stock hook-and-loop strap from the stock battery tray and install on BowHouse RC battery tray.
Before installing the BowHouse battery tray, start a screw into each screw hole in the BowHouse tray for 3-4 turns.
Gently spread the chassis rails to insert the BowHouse battery tray in chassis. You may need to gently bend the upper motor lead down for better clearance.
Insert all 4 screws to secure BowHouse battery tray to chassis.
ESC mount:
Remove the stock body mount(s) from the shock towers and save stock screws.
Remove the stock ESC from the stock ESC mount carefully. If removed carefully, you can reuse the double stick tape on the bottom of ESC. If necessary, remove the original double-stick tape and replace with new tape, hot glue, or other adhesive.
Unscrew upper ball studs securing front shocks to shock mounts.
Remove 4 screws holding stock ESC tray in place.
Before installing the BowHouse ESC mount, start a screw into each screw hole in the BowHouse mount for 3-4 turns.
Gently spread chassis rails to remove stock ESC tray and insert BowHouse ESC tray into chassis.
Install 4 screws holding ESC mount to chassis.
Attach shock ball studs to shock mounts in the appropriate position. Note that shocks are mounted in front of body mount posts on certain models (e.g., Jeep Wrangler and C10 versions) and behind body posts on other models.
Install ESC on ESC mount. For certain models (e.g., Betty and Jeep Wrangler), ESC should be rotated so that the servo wire plugs are on the drivers (left) side and the motor and battery plugs are located toward the front of the truck. On other models, the ESC can be installed with the servo wire plugs in front and the motor and battery plugs on the passenger side, similar to the stock configuration.
If the ESC is mounted in the rotated position, we recommend running the servo lead through the space between the chassis rail and the BowHouse ESC mount on the drivers side (see pictures).
Install body mount(s) into BowHouse RC low CG ESC tray using stock screws. We recommend using a sewing needle or pin to line up screw holes in ESC tray and body mount(s) before starting the screws.
You may need a short servo extension to plug lights into ESC if you are using stock headlights.
FOR BATTERY FORWARD CONFIGURATION
Follow the same steps to remove stock battery tray and ESC mount.
Install hook-and-loop battery strap into BowHouse ESC mount instead of on battery tray.
If you are using stock headlights, you will need a short servo extension cable to connect the lights to the ESC. On some models, you will also need a short servo extension cable to connect the servo to the ESC.
Battery forward configuration may result in nearly full droop on front shocks depending on your setup.
It all started with a trail run. After watching David's TF2 hang up on every rock and root and blade of grass for 2 hours, Nick said, "Hey, I can fix that for you." A couple of weeks later, Nick gave David a prototype that he said he'd need back (David still hasn't given it back), and the N2R skid was born. Originally sold as a Helios RC product, the feedback was so good that we decided to form BowHouse RC to create more cool stuff for your RC trucks.
We've now expanded our offerings to include parts for the Axial SCX10 / SCX10 II, Traxxas TRX-4, HPI Venture, GCM CMAX, as well as a full line of axles for your scale builds.
All of our parts are developed in-house using sophisticated 3D scanning technology and CAD modelling. We choose materials that are both strong enough and flexible enough to withstand plenty of abuse. Most parts are printed using either selective laser sintering (SLS nylon) or carbon fiber-reinforced nylon filament.
We have plenty of new products in the works, and we're always open to hearing about products you'd like to see. So if you're looking for something we don't have, feel free to send us an email. Thanks for visiting our site!
ATees.com uses cookies and similar technologies. By using ATees.com, you are agreeing to our revised Privacy Policy and Terms and Conditions, including our Cookie Policy.