RC Basics: Guide To Help You Understand More About RC
Choosing the right kit type for you:
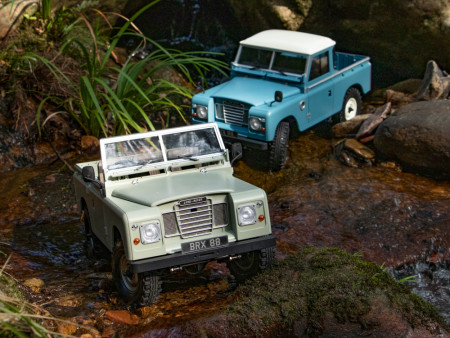
The first thing you would do is choosing the right chassis for you and if you want to build it yourself or part built or something that is completely built. There is a wide range of manufacturers out there on the market such as RC4WD Gelande II, Boom Racing Gelande II, Axial SCX10 and MST CFX or CFX-W that are perfect for a D90 build. All these chassis vary in price range from very expensive to more affordable ones so you can choose from what your budget allows. Also allot of them give you the choice of RTR, ARTR or Kit so depending on your skill level and where you want to start from.
Kit types:
What’s a RTR, ARTR and Kit.
RTR means Ready To Run so it’s already built and everything is assembled and comes with everything apart from a charger and the batteries for the radio & car.
ARTR means Almost Ready To Run so out of the box it is half built and will need a few things putting together and might require a few more other items such as electronics for it to fully function.
Kit means the whole thing needs to be put together and usually does not come with any electronics 
Choosing a servo:
So after you have chosen the chassis you want to use you then got to think about the electronics, for simpler rigs you will need the following. One high torque servo for examples here are a few different manufacturers CYS, Graupner or Savox, to find out the torque rating you need to look at the specifications of the servo as they are all different it also depends on what voltage you’re going to operate your servo at manufacturers usually list 2 different operating volts the same goes for servo speed. Waterproof is optional depending if you want to run it in water, mud or snow!
Choosing an ESC and motor:
Then there is the electronic speed controller known as the (ESC) this is the unit that distributes the power from the battery to all your electronics such as your receiver it also regulates the speed of your motor there is a big range of different ESC and motor’s you can choose from and also if you want to go with a brushed or brushless setup. For beginners it is easier to start out on a brushed setup as there are fewer things to program and they are cheaper to purchase. If you want a few recommendations here we have a few good beginner setups to choose from which are the Hobbywing Combo or Snow Panther Combo which is the ESC and A motor. If you don’t know what motor to choose or what the T means on the motor the easiest way to explain it is, the higher number T on the motor the slower it is but it has more torque power, the lower the number T on the motor means the faster the motor is but the less torque power you get. You also have the choice between a brushed and brushless system but for beginners and crawlers it is better to keep to brushed systems.
What is the difference between a brushless motor and brushed motor?
Brushed system:
A Brushed Motor has a rotating set of wound wire coils (armature) which acts as an electromagnet with two poles. A mechanical rotary switch (commutator) reverses the direction of the electric current twice every cycle, to flow through the armature so that the poles of the electromagnet push and pull against the permanent magnets on the outside of the motor. As the poles of the armature electromagnet pass the poles of the permanent magnets, the commutator reverses the polarity of the armature electromagnet. During the instant of switching polarity, inertia keeps the motor going in the proper direction. Brushed motors operate better in more extreme environments due to lack of electronics.

Brushless system:
A Brushless Motor uses a permanent magnet external rotor, three phases of driving coils, one or more devices to sense the position of the rotor, and the associated drive electronics. The coils are activated, one phase after the other, by the electronic speed controller as cued by the signals from the rotor position sensors. The superior power and efficiency of a brushless motor make them the ideal choice for high performance speed range also has less maintenance due to absence of brushes.


Choosing a radio system:
Next up you have to think about how to control the rig so a transmitter and receiver is required (Radio System) for beginners a 2-3 channel Radio system will be plenty to get you started and going in the right direction. Fly Sky, Radiolink and Dragon RC are very affordable Radio systems. There are also two different types of controllers the stick type or pistol type so you can choose depending on what you prefer to hold.

When you have made your choice on everything:
After you have chosen on how you want to start your project such as RTR, ARTR or kits you will then know what you need to purchase once you have made up your mind on chassis and electronics you want to purchase and use. When you have all the things you need you can then follow the instructions to assembling your rig and install the electronics if you have gone for a kit type if you have gone RTR that’s also fine all you have to do is get a battery and charge it up and you’re ready to go and have hours of fun!
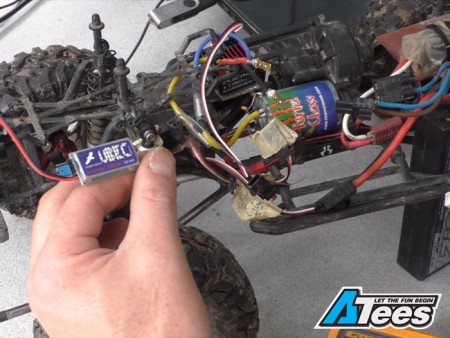
Choosing a battery and charger:
To choose the wright battery for your chosen rig it depends what ESC you have chosen as that is the part where you plug the battery in and it distributes the power for the electronics in the rig all there are also different types of batteries. Manufacturers have specifications on what batteries can be used with their products. For Chargers there is a wide range out there but most are capable of charging different types of batteries.


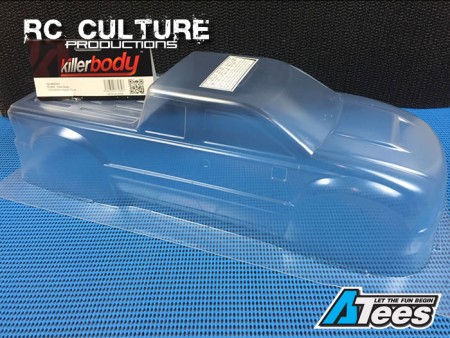
Choosing a body shell if required:
For the body shell some cars come with it and some don’t depending on what you have chosen. If you need to purchase a body shell separately from your chassis you need to make sure it will fit over your chassis usually the body shells are measured for length, width and wheelbase. Wheelbase is basically measured from the center point of the front wheel to the center point of the rear wheel. Also you can choose if you want to use a hard body or a Lexan / Polycarbonate. Lexan / Polycarbonate body shells usually come clear and need cutting out but you can get pre-painted and pre-cut ones. Hard body is what it says it is molded out of plastic so it’s a hard plastic.
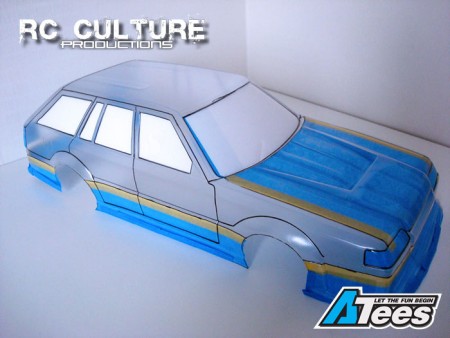
Painting a lexan / polycarbonate body shells:
With clear body shells all the work is done on the inside as the outside has a overspray film on it (IMPORTANT PAINT THE INSIDE) Once you have cut out your body you need to wash it with soapy water to wash of the releasing agent used in the vacuum molding process. Once washed and dried you can then mask all the areas you don’t want painted usually body shells come with window masking. Paint it in your desired colour then once everything is painted you can then remove the overspray film and reveille the true colour of your body then apply decals and fixings to the body.

Painting hard bodies:
For hard bodies you would start to rub id down a little bit just to get the imperfections out as on hard bodies you have to paint the outside but make sure you don’t use sandpaper that is to coarse (NOT TO ROUGH) also sanding it will help the paint stick to the plastic better. Before you apply the colour you need to prime it for the better result and it helps fill up some of the imperfection’s and sanding marks to give you a nice smooth surface to apply the colour. After colour is applied to all the areas you want you need to lacquer / clear coat it if you want the paint to last longer and have a nice shine to it and the last process once everything is painted and dry is assembling the body.