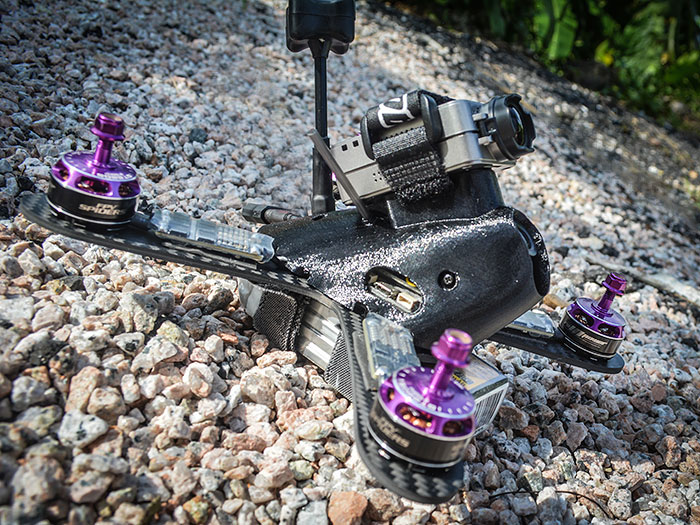
Overview Of A Custom Carbon Fiber FPV Drone Build
Here is an overview and parts list of all the items used for this awesome Carbon Fiber FPV Drone Build!


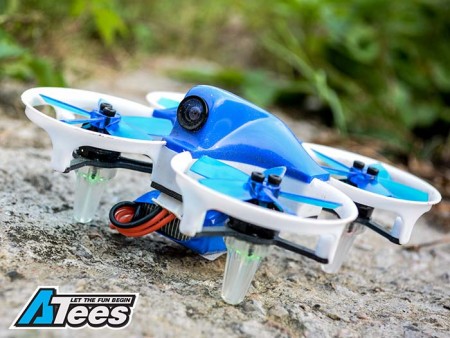
| · Frame: | ShenDrone Mako 200 4-inch Carbon Fiber Quadcopter with 2.1 Lens 3D-Printed Pod |
| · Receiver: | FrSky XSR 2.4GHz 16CH Receiver |
| · Motor ESC: | FVT LittleBee 30A BLHeli ESC |
| · Motor: | FPV Spider x RCINPOWER GT2205 2700KV Brushless Motor |
| · Power Distribution Board: | Matek Mini PDB With 5V&12V BEC |
| · FPV Camera: | Foxeer XAT600M 5-22V Sony 600TVL FPV Camera |
| · FPV VTX: | Foxeer 5.8GHz 200mW 40CH TM25 VTX |
| · Flight Control: | SPRacing FC Acro |
After selecting and receiving all the parts needed he then proceeded to fit the Foxeer XAT600M 5-22V Sony 600TVL FPV camera into the 2.1 lens 3D-printed main body pod, making sure it fits nice and snug in the space and then he secured it down with some screws.


He then took the heat shrink of the FVT LittleBee 30A BLHeli ESC exposing the circuit board and wires making it easier to gain access to the wires to desolder the necessary wires from the circuit board.


After de-soldering the necessary wires and soldered on the FPV Spider x RCINPOWER GT2205 2700KV Brushless Motor’s to the FVT LittleBee 30A BLHeli ESC and laying out everything on the ShenDrone Mako 200 4-inch Carbon Fiber Quad-copter frame making sure everything will fit nicely he attaches the motors to the frame. After everything is soldered and done on the ESC he put new heat shrink over the exposed ESC circuit board to protect it from any dirt or dust.


He proceeds on with modifying the Matek Mini PDB With 5V&12V BEC which is the Power Distribution Board, he does this by removing some unnecessary wires from the connecter that goes into the Foxeer 5.8GHz 200mW 40CH TM25 VTX where the FPV System operates from.


Returning back to the frame he attaches the Power Distribution Board in the center of the frame securing it with some screws and he also attaches the ESC with some double sided tape. Completing that process he then finishes soldering on the ESC to the Power Distribution Board and connecting all the wires for the FPV system, battery and the FrSky XSR 2.4GHz 16CH Receiver to get it ready for an electrical test.


Once all the electrical system work as it should he attaches the 3D printed pod that houses the camera and the receiver to the carbon fiber frame with some screws making sure all the wires are tucked in nice and neat. The battery is secured by using two Velcro straps at the bottom of the frame. The 3D printed pod also has another Velcro strap on the top built in that allows the user to attach another camera for recording. All left to do now is to attach the Propellers and take to the sky!


For more Drone related parts visit our website here.