Armattan MRP130 Build Guide And Review
Before we start, here's a list of all the parts we used in this build!
Parts Used:
- Armattan MRP 130 FPV Quadcopter Frame
- FrSky XSR 2.4GHz 16CH Receiver
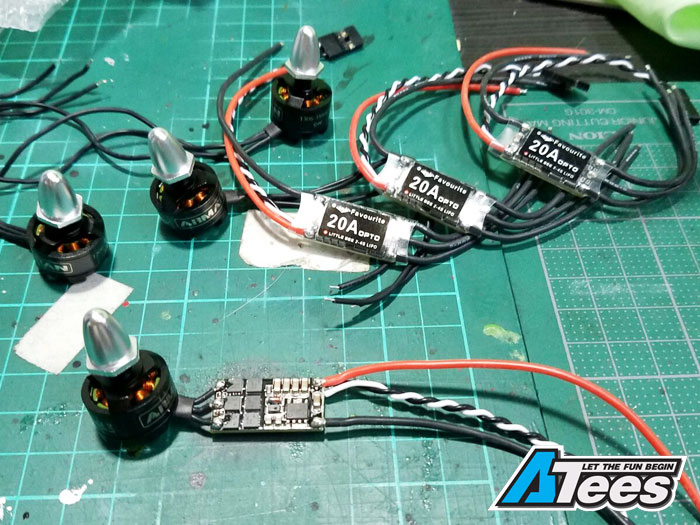
- FVT LittleBee 20A BLHeli ESC
- DYS BX1306 4000KV Brushless Motor (1 pair CW & CCW)
- Matek Mini PDB With 5V&12V BEC
- Foxeer XAT600M 5-22V Sony 600TVL FPV Camera
- Foxeer 5.8GHz 25mW 40CH TM25 VTX
- SPRacing FC Acro
The MRP130 was a tricky little build to finish, as there was very limited space to place everything in. With the list above, let's get started on how we did this.
Before we put the frame together, we did some pre-emptive work and measured all of the wires and cables necessary for this build. As it was a very tight build, you have to be careful how you install things. We measured out the lengths for the Motors to ESCs, and the ESC to the PDB board. As the arms aren't very long, your motors to ESC wires will be incredibly short. We cut it down to almost 10mm in length and direct soldered it on. If you're not comfortable with this, you can do the loop method where you loop the motor wires under the ESC, come back up over the top, and solder it that way to provide some room for error.
After you finish soldering on all of the motors to ESCs, you can try test fitting the motors and ESC onto the frame. In the heart of the frame, the bottom stack will be using Matek's PDB, which comes with a 12V or 5V BEC regulator for your FPV gear and FC!
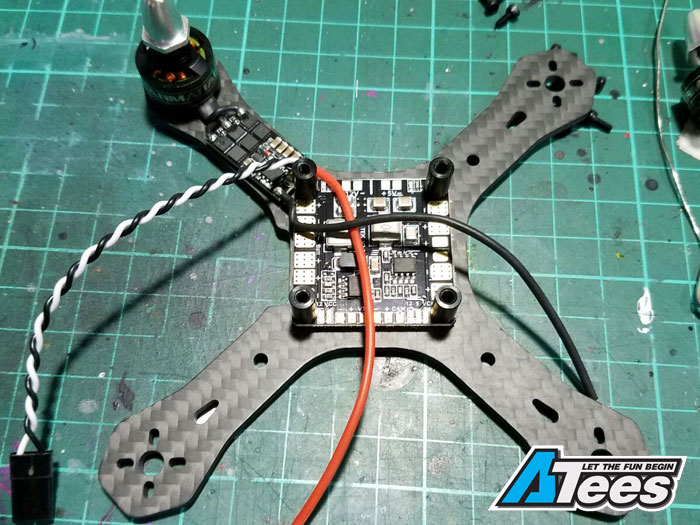
Once it's on the frame and everything's ready, start soldering the negative and positive wires from your ESC onto the PDB. These will be cut down to length as well to save as much weight as possible. Before you solder the wires, you have to tin the PDB so that there's some solder on it first. Easiest way is to use some solder flux, dab a bit onto the board, and add some solder.
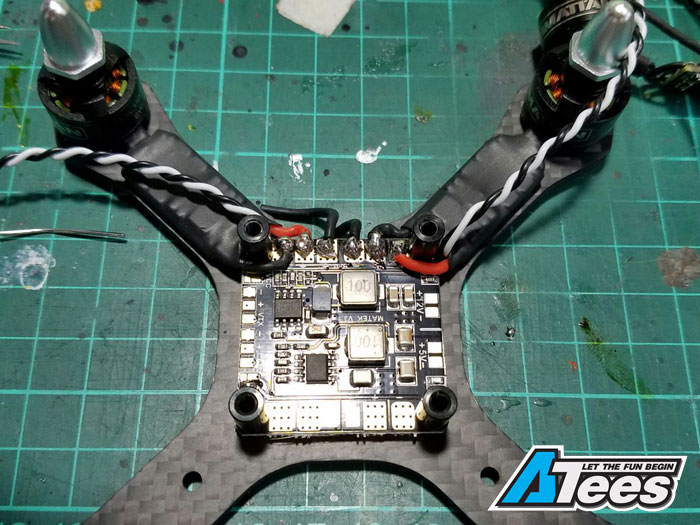
After everything's been soldered on for the bottom level, time to place our flight controller! We used this SP Racing F3 board, and direct soldered all of the ESC signal and ground wires directly. We drew the 5V from the PDB's BEC regulator and powered it through that on the plug.
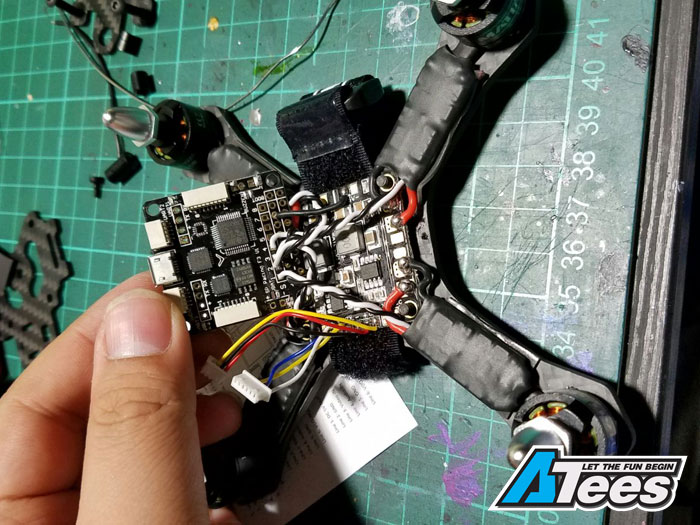
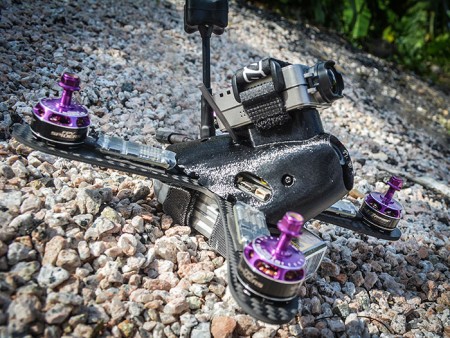
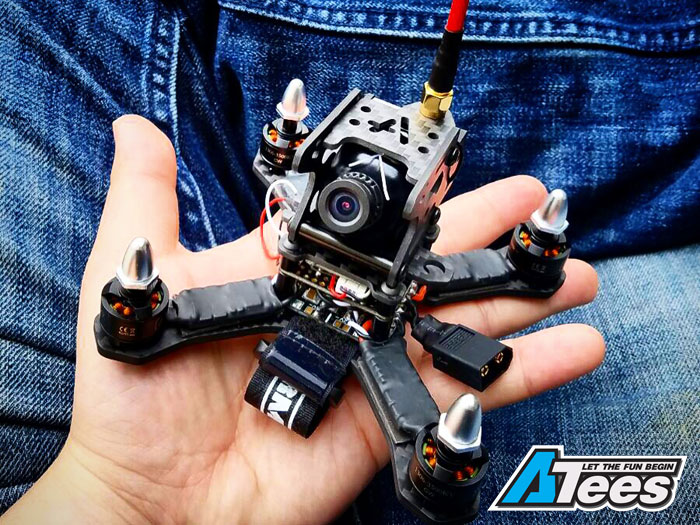
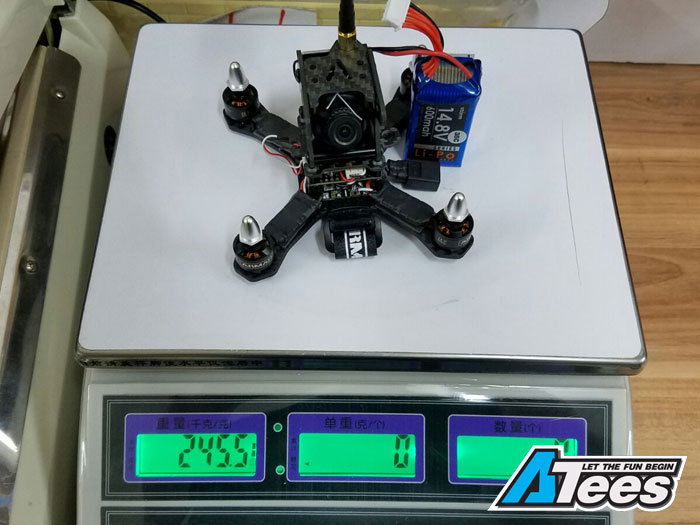
After the FC has been done, placed the XSR on top of the FC and place some foam between it to cushion it odwn. After that, you can install the pod above it, which should be able to hold your FPV camera and VTX in the slots provided. You can look at the image below to get a feel for what it looks like in the end. The final weight of this build with a 4S 600mAh LiPo is 245.5 grams, which is 4.5g under the regulation weight! Woohoo!
Overall, this build was slightly difficult to get together, just because there isn't room for error. It flies wonderfully well though, and is below the legal regulation weight of 250g. the carbon fiber's quality is fantastic and Armattan has that awesome life-time warranty for their frame! Make sure you pick it up from that list above!
Let us know if you liked this type of blog, and if you want to see other builds!
ByChris Chu
Tags :Armattan Quads, multicopter, quadcopter, multirotor, MRP130, build
Share:http://asiate.es/read?l=7N31DR_MRX4